Italian translation on request. :)
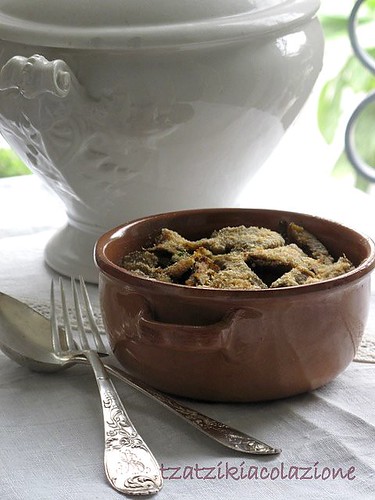
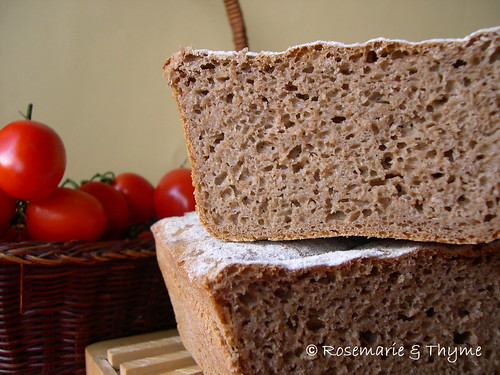
baked and sliced
Our Daring Bakers Host for December 2011 was Jessica of My Recipe Project and she showed us how fun it is to create Sour Dough bread in our own kitchens! She provided us with Sour Dough recipes from Bread Matters by AndrewWhitley as well as delicious recipes to use our Sour Dough bread in from Tonia George’s Things on Toast and Canteen’s Great British Food!
Posting Date: December 27, 2011
This is my first Daring.
I was glad to see that this month's host, Jessica of
My Recipe Project had chosen to challange us to make bread using sour dough. I am acquanted with sour dough but I was intrigued by the fact that the first recipe given by Jessica was for rye bread. I never made a straight rye sourdough before. I also know that
rye is good for you and that we should eat less white (wheat) bread so I decided to accept the dare. The Russian Rye bread for me!
First problem was finding the wholemeal rye flour, I was afraid I would not find it in shops easily, so I started to look on the internet, but then I thought that by the time it would be delivered I may not have the time to prepare the sourdough.
In the end it did not turn out as difficult as I thought, I found the flour not too far from home in a health store and it is stoneground, too. What else!
So here starts my visual journey into the rye bread world. I decided for a red background seeing the posting date is just after Boxing day.
Rye sourdough starter in the making...
There's no picture of the dough as it was night when I kneaded and proofed it and I usually don't take pictures at night as mine turn out awful. The dough was pretty sticky and the bread turned out super moist. Maybe in my case a little more flour could have been added. Not all flour is the same, plus the air in the kitchen may have more or less humidity depending on the day's weather and season.
Oh, I detail I must not forget. I baked this bread in a bread tin that my auntie gave me years ago. She had bought it in London when, as a newly graduated M.A. (language) she was there to practice her English.
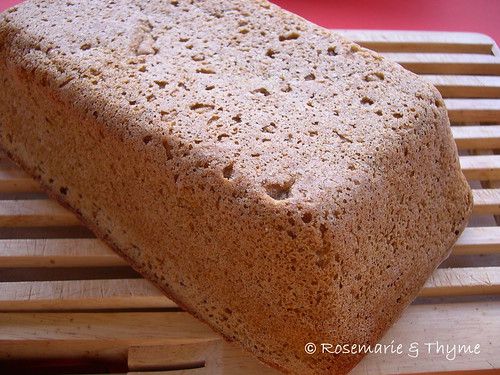
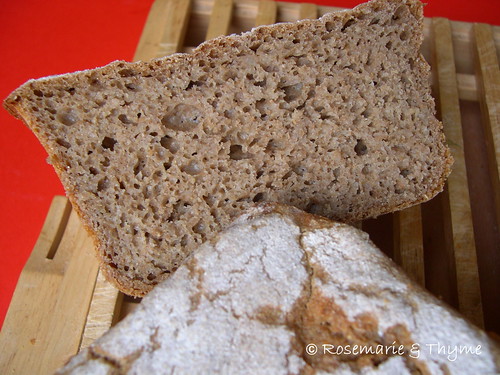
upside down loaf
cut loaf
____________________ _ ___________________
Here is the advice and instructions that Jessica gave us, together with two alternative recipes to make.
Hi everyone, I’m Jessica from My Recipe Project. I’m very excited to be your host this month and am even more delighted to be sharing my favourite bit of baking with you: sourdough bread!
What’s that, you say? Sourdough is made without adding any yeast or leavening, so we’ll be fermenting our own sourdough ‘starters’. The natural yeasts in the flour do the work of making a lovely loaf of bread – we just facilitate that process. Sourdough is basically bread as your great-, great- grandmother knew it, before the days of Chorleywood (i.e. factory-made, steamed, sliced, additive-filled) bread and packaged yeast. It takes time, but not too much active work – so don’t panic! And it’s very worthwhile – many people find sourdough a bit easier to digest (because the naturally-occurring lactobacilli have done a lot of the digestion work over the long preparation time), the slow-process means many of the good nutrients in the bread are more available for digestion, and while factory-made bread can contain 15+ ingredients, sourdough only needs three: flour, salt, and water. I’ve provided three recipes: one rye bread, one wheat bread, and one gluten-free option. If you are gluten-free, you don’t have to use this recipe – I thought I’d provide it just in case!
Once you have a beautiful loaf of sourdough, we’ll be showcasing our bread using a recipe of our own choice, though I’ve given a couple suggestions. In a very British approach to this month’s challenge, I’ve suggested a) Welsh Rarebit; or b ) Mushrooms on Toast. But these are just suggestions – be creative and come up with your own if you like! The idea is to show how good bread is central to the history of food – and it can be the canvas on which we deliver so many other flavours.
So how does sourdough work, you ask? Sourdough starts with a ‘starter’ or ‘leaven’, basically a flour and water dough that is fermented over about 4 or more days. The older your starter, the more flavourful your bread will be – this is because the lactobacilli in the dough help digest the flour, adding the strong, sour flavour and making it more digestible, kind of like yoghurt. The bakery I used to buy bread from in London had a starter that was over 150 years old! Basically, as the starter ferments, the wild yeasts on the flour begin to eat the sugar in the dough – releasing carbon dioxide bubbles. This starter forms the base of your dough, leading to a nice, slow rise!
I first ate sourdough many years ago, while living in Nova Scotia, but it wasn’t until moving to England that I started learning how to bake my own. After lots of practice, I’ve been baking all my own bread for over a year now, so hopefully I’ll be able to guide you through this month. The biggest challenges I had when starting out were getting over my squeamishness about messy dough, because sourdough will be much wetter than most yeasted doughs, and learning how to fit the time-sensitive process into my busy lifestyle. Each of the recipes given here have different time requirements, so have a look at what works best for you, and see the tips in the Notes section! Good luck and good baking – I look forward to some stunning breads and bread-based dishes!
Recipe Source: For the bread recipes, I’ve turned to my bible of bread: Bread Matters by Andrew Whitley. We’ll be baking his “French Country Bread”, “Russian Rye Bread”, or “Rice, Brazil Nut, and Flaxseed Bread”. We’re also using Canteen’s Great British Food for the “Welsh Rarebit” recipe and Tonia George’s Things on Toast for “Garlic and Oregano Roasted Mushrooms on Toasted Sourdough”.
Blog-checking lines: Our Daring Bakers Host for December 2011 was Jessica of My Recipe Project and she showed us how fun it is to create Sour Dough bread in our own kitchens! She provided us with Sour Dough recipes from Bread Matters by AndrewWhitley as well as delicious recipes to use our Sour Dough bread in from Tonia George’s Things on Toast and Canteen’s Great British Food!
Notes:
• Good bread starts with good flour. Beyond trying to find good quality, local (organic if possible) flour, Whitley recommends finding out three things: how was it milled? (stoneground ideally, to retain more nutrients); how much of the original grain is left in the flour (ideally 95-100 % for bread making); and lastly, how much protein is in the flour? (the more protein, the more gluten, leading to a more stretchy dough – ‘strong’ or ‘bread’ flour indicates a higher level of protein).
• Normal tap water is fine in most cases, unless you live in a municipality that heavily chlorinates the water. Chlorine will kill almost all bacteria, including your yeast, so you’ll want to use filtered water if you can. Whitley says that leaving water in a pitcher overnight can rid most of the chlorine.
• If you clean your kitchen with anti-bacterial products or harsh cleaners, try not to do it before baking and make sure your bowls are clean but have no chemical residue left on them! Many a bread has been deflated by an overly-sterilised kitchen.
• All of these recipes call for sea salt because it retains a higher level of minerals and has a stronger salt taste, meaning you can use less of it. Never add salt directly to your starter – it will kill the yeast, so use the following method: dissolve your starter in water, stir your salt through your flour, then mix the wet with the dry ingredients.
• When greasing pans for baking, try to use hard fats like butter because oil can drip down the pans and lead to a fried bottom on your loaf!
• When working with the dough, you might feel inclined to heavily flour your work surface or your hands. Resist this urge! Sourdough is meant to be wet and sticky – this helps to give the bread a nice crumb once it has baked. I work most doughs with my hands, but sometimes use a dough scraper to help lift and fold the dough. When I need to pick up or shape a loaf, I find damp hands work better than floured ones!
• If you don’t have dough scrapers, old bank cards/credit cards work just as well! But wash them thoroughly first.
• Try to work with your hands to make these recipes – mixing and kneading the dough by hand means you’ll get a better sense of how your dough should feel! We learn by doing!
• Remember, a lot of these timings are guidelines – pay attention as, depending on temperature and your starter, you may need more or less time to proof your dough. You want a dough that resists poking a bit (if you poke it, the hole will disappear) but not one that quivers all over and seems really fragile.
• Cutting the top of your loaf before it goes in the oven helps it to expand or split at those points. This means you don’t end up with funny outgrowths from your bread! You want to be quick, gentle, and use a very sharp blade – see the video at the end for tips.
• Notes on scheduling: For the Rye loaf, and all the other starters, I find it helpful to start the process on a Monday, so that come Friday/Saturday you are ready to bake. I refresh my starter (Stage 1) the night before baking, then do Stage 2 in the morning. For the French Country Bread, I refresh the starter in the morning, make the final dough at lunchtime, and bake at dinner time. For the Rice Sourdough, I soak the flaxseeds on a Friday morning, refresh my starter on Saturday morning, the prep the final dough at lunchtime, ready to bake at dinner.
• I would set the difficulty level of these recipes as: Rye – Easy!, French Country Bread – Med-Hard!, Rice Sourdough – Easy!
• Once you’ve finished baking, you’ll have some leftover starter. Keep this in a Tupperware container, as this is what you will use to start your next loaf (and so on…)! Some of the best starters are hundreds of years old – and they get better with time. If you bake daily, you can keep your starter at room temperature. If you bake weekly, I’d keep it in the fridge. You can also freeze starter if you bake very infrequently, but I find it does fine in the fridge so long as you feed it at least once a month. Simply refresh your starter according to the recipe – or with equal parts by weight of flour and water – and let it come back to life at room temperature.
• You might notice that your starter starts to smell a bit like acetone – this is completely normal. It may develop a grey liquid on top, which you can either pour off or stir back into the starter. When I refresh mine, I discard half of the original starter and add in fresh flour and water for the yeast to feed on.
• Sometimes, very rarely, a starter might get moldy. This is often due to being left at room temperature without feeding. If there is a lot of mold throughout the starter, I would discard it. But the odd bit is not always a problem. It is nearly impossible to kill a starter, unless you get salt or chemical products in it – so don’t fret! Often it is just a matter of feeding it over a few days and nursing it back to life.
Mandatory Items: You must make a sourdough starter and bread without the use of any added leavening (i.e. you must ferment a sourdough). You must use one of the bread recipes given, unless you are gluten-free or you have dietary requirements which require otherwise. You must make a recipe that showcases the bread using either one of the suggested recipes or a recipe of your choice.
Variations allowed: You can add whatever decorative flourishes you like to the recipes, though be wary of adding too much to the bread itself. Gluten-free and vegetarian bakers can adjust recipes as needed. Your showcasing recipe can be a recipe of your choice. Likewise, you can add any extra flavours you like to the suggested showcasing recipes.
Preparation time:
See the notes section for tips on fitting sourdough into your busy life!
French Country Bread: Wheat Leaven: 5 Days (no more than an hour active time), Bread: 9-11 Hours (no more than two hours active time)
Russian Rye Bread: Rye Leaven: 5 Days (no more than an hour active time), Bread: 16-22 Hours (no more than two hours active time)
Rice, Brazil Nut, and Flaxseed Bread: Rice Leaven: 5 Days (no more than an hour active time), Bread: 32 Hours (no more than two hours active time)
Welsh Rarebit: 20 minutes
Mushrooms on Toast: 30 minutes
Bread and Butter Pudding: 90 minutes (an hour active time)
Equipment required:
• Small mixing bowls
• Plastic tub for storing sourdough starter (yoghurt tubs or Tupperware work well)
• Mixing spoons
• Measuring spoons
• Measuring cups
• Thermometer
• Large mixing bowl
• Dough scrapers (Note: old credit cards, washed well, are a good alternative)
• Weighing scale (optional)
• Banneton/Proofing basket (can be made by sewing an unbleached linen lining into an approx. 8 inch (20 cm) diameter wicker basket) (Optional)
• Large plastic bags
• Baking sheets
• Loaf tins
• Razor blade or sharp non-serrated knife
• Cooling rack
• Pastry brush
• Knives
• Saucepans
• Toaster
• Oven-proof dish
Russian Rye Bread
Servings: 1 large loaf or 2 small loaves and excess rye starter to keep for further baking.
Rye Starter - Day 1:
Ingredients
3 tablespoons plus 1 teaspoon (50 ml) (25 gm/1 oz) whole (dark) rye flour
1/4 cup (60 ml) water (at 104°F/40°C)
Total scant ½ cup (110 ml) (3 oz/85 gm)
Directions:
1. In a Tupperware or plastic container, mix the flour and water into a paste.
2. Set the lid on top gently, cover with a plastic bag, to prevent messes in case it grows more than expected!
3. Set somewhere warm (around 86°F/30°C if possible). I sometimes put mine on a windowsill near a radiator, but even if it’s not that warm, you’ll still get a starter going – it might just take longer. It should be a very sloppy, runny dough, which will bubble and grow as it ferments.
Rye Starter - Day 2:
Ingredients
3 tablespoons plus 1 teaspoon (50 ml) (25 gm/1 oz) whole (dark) rye flour
1/4 cup (60 ml) water (at 104°F/40°C)
scant 1/2 cup (110 ml) (3 oz/85 gm) starter from Day 1
Total scant 1 cup (220 ml) (6 oz/170 gm)
Directions:
1. Stir the flour and water into the mixture from Day 1, cover, and return to its warm place.
Rye Starter - Day 3:
Ingredients
3 tablespoons plus 1 teaspoon (50 ml) (25 gm/1 oz) whole (dark) rye flour
1/4 cup (60 ml) water (at 104°F/40°C)
scant 1 cup (220 ml) (6 oz/170 gm) starter from Day 2
Total 1 cup plus 6 tablespoons (330 ml) (9 oz/255 gm)
Directions:
1. Stir the flour and water into the mixture from Day 2, cover, and return to its warm place. If you notice it has a grey liquid on top, just stir this back in and continue as normal.
Rye Starter - Day 4:
Ingredients
3 tablespoons plus 1 teaspoon (50 ml) (25 gm/1 oz) whole (dark) rye flour
1/4 cup (60 ml) water (at 104°F/40°C)
1 cup plus 6 tablespoons (330 ml) (255 gm/9 oz) starter from Day 3
Total about 1¾ cups (440 ml) (12 oz/340 gm)
Directions:
1. Stir the flour and water into the mixture from Day 3, cover, and return to its warm place. At this point it should be bubbling and smell yeasty. If not, repeat this process for a further day or so until it is!
Rye Starter, ready for baking.
Russian Rye Bread - Step 1: Production Sourdough
Ingredients
1/4 cup less 2 teaspoons (50 ml) (50 gm/1 ¾ oz) rye leaven (starter)
1 cup plus 2 teaspoons (250 ml) (150 gm/5 ? oz) whole (dark) rye flour
1 1/4 cups (300 ml) (300 gm/10 ½ oz) water
Total 2½ cup (600 ml) (500 gm/17½ oz/1 lb 1½ oz)
Directions:
1. Mix everything into a sloppy dough. Cover and set aside for 12-24 hours, until bubbling. Set aside the remaining starter for further loaves – see the Notes section for tips!
Russian Rye Bread - Step 2: Final Dough
Ingredients
2 cups (480 ml) (440 gm/15 ½ oz) production sourdough (this should leave some (½ cup) to become your next loaf of bread!)
2 1/3 cups (560 ml) (330 gm/11 ? oz) rye flour (light or whole)
1 teaspoon (5 ml) (5 gm/.2 oz) sea salt or ½ teaspoon (2½ ml) (2½ gm/.1 oz) table salt
3/4 cup plus 2 teaspoons (200 ml) (200 gm/7 oz) water (at 104°F/40°C)
Total 5 cups plus 3 tablespoons (1245 ml) (975 gm/2 lb 2? oz)
Directions:
1. Mix all the ingredients together to form a soft dough. With wet hands, scoop the dough up and put it in a well-greased loaf tin.
2. Put the tin inside a large plastic bag, blow it up, and seal it. This should make a good little dome for your bread to proof inside. Set aside somewhere room temperature to warm.
3. The dough should be ready to bake with in anywhere between 2-8 hours, depending on how warm it is. I proof mine by a sunny window in about 4 hours. If the dough was halfway up the tin when you started, it will be ready when it reaches the top (i.e. almost doubles in size).
4. Preheat the oven to very hot 470°F/240°C/gas mark 9. For a large loaf, bake for 50-60 minutes, reducing the temperature to moderately hot 400°F/200°C/gas mark 6 after about 10-15 minutes. If baking in small loaf tins, bake for 35-45 minutes, reducing the temperature after 10 minutes. If you are unsure about whether it is done, give it a few minutes longer – it is a very wet dough, so the extra time won’t hurt.
5. Leave to cool on a cooling rack, and rest the loaf for a day before eating it.
French Country Bread
Servings: 1 large loaf plus extra wheat starter for further baking
Wheat Starter - Day 1:
Ingredients
4 1/2 tablespoons (70 ml) (40 gm/1 ½ oz) stoneground breadmaking whole-wheat or graham flour
3 tablespoons (45 ml) water
Total scant ½ cup (115 ml) (3 oz/85 gm)
Directions:
1. In a Tupperware or plastic container, mix the flour and water into a paste.
2. Set the lid on top gently, cover with a plastic bag, to prevent messes in case it grows more than expected!
3. Set somewhere warm (around 86 F if possible). I sometimes put mine on a windowsill near a radiator, but even if it’s not that warm, you’ll still get a starter going – it might just take longer.
Wheat Starter - Day 2:
Ingredients
4 1/2 tablespoons (70 ml) (40 gm/1 ½ oz) stoneground breadmaking whole-wheat or graham flour
3 tablespoons (45 ml) water
scant 1/2 cup (115 ml) (3 oz/85 gm) starter from Day 1
Total scant cup (230 ml) (6 oz/170 gm)
Directions:
1. Stir the flour and water into the mixture from Day 1, cover, and return to its warm place.
Wheat Starter - Day 3:
Ingredients
4 1/2 tablespoons (70 ml) (40 gm/1 ½ oz) stoneground breadmaking whole-wheat or graham flour
4 teaspoons (20 ml) water
scant 1 cup (230 ml) (6 oz/170 gm) starter from Day 2
Total 1? cup (320 ml) (230 gm/8-1/10 oz)
Directions:
1. Stir the flour and water into the mixture from Day 2, cover, and return to its warm place.
Wheat Starter - Day 4:
Ingredients
3/4 cup plus 1½ tablespoons (205 ml) (120 gm/4 ¼ oz) unbleached all-purpose flour
1/2 cup less 4 teaspoons (100 ml) water
1? cup (320 ml) (230 gm/8 oz) starter from Day 3
Total scant 2? cup (625 ml) (440 gm/15½ oz)
Directions:
1. Stir the flour and water into the mixture from Day 3, cover, and return to its warm place. At this point it should be bubbling and smell yeasty. If not, repeat this process for a further day or so until it is!
French Country Bread
Stage 1: Refreshing the leaven
Ingredients
1 cup less 1 tablespoon (225 ml) (160 gm/5 ? oz) wheat Leaven Starter
6 tablespoons less 1 teaspoon (85 ml) (50 gm/1¾ oz) stoneground bread making whole-wheat or graham flour
1 cup plus 2 teaspoons (250 ml) (150 gm/5 ? oz) unbleached all purpose flour
1/2 cup (120 ml) water
Production Leaven Total 2¾ cups plus 4 teaspoons (680 ml) (480 gm /1 lb 1 oz)
Directions:
1. Mix everything into a sloppy dough. It may be fairly stiff at this stage. Cover and set aside for 4 hours, until bubbling and expanded slightly.
French Country Bread
Stage 2: Making the final dough
Ingredients
3/4 cup less 1 teaspoon (175 ml) (100 gm/3 ½ oz) stoneground breadmaking whole-wheat or graham flour, plus more for dusting
2 cups plus 2 tablespoons (510 ml) (300gm/10 ½ oz) unbleached all-purpose flour
1¼ teaspoons (7½ ml) (7 gm/¼ oz) sea salt or ? teaspoon (3? ml) (3 gm/? oz) table salt
1 ¼ cups (300 ml) water
1 ¾ cups (425 ml) (300 gm/10 ½ oz) production leaven – this should leave some (1 cup) for your next loaf.
Total 6 cups less 2 tablespoons 1415 ml (1007 gm/35 ½ oz/2 lb 3½ oz)
Directions:
1. Mix the dough with all the ingredients except the production leaven. It will be a soft dough.
2. Knead on an UNFLOURED surface for about 8-10 minutes, getting the tips of your fingers wet if you need to. You can use dough scrapers to stretch and fold the dough at this stage, or air knead if you prefer. Basically, you want to stretch the dough and fold it over itself repeatedly until you have a smoother, more elastic dough.
See my demonstration here: http://www.youtube.com/watch?v=OqS3raEGdwk
3. Smooth your dough into a circle, then scoop your production leaven into the centre. You want to fold the edges of the dough up to incorporate the leaven, but this might be a messy process. Knead for a couple minutes until the leaven is fully incorporated in the dough. See my demonstration here: http://www.youtube.com/watch?v=UPO97R4iO4U
4. Spread some water on a clean bit of your work surface and lay the dough on top. Cover with an upturned bowl, lining the rim of the bowl with a bit of water. Leave for an hour, so that the gluten can develop and the yeasts can begin to aerate the dough.
5. Once your dough has rested, you can begin to stretch and fold it. Using wet hands and a dough scraper, stretch the dough away from you as far as you can without breaking it and fold it back in on itself. Repeat this in each direction, to the right, towards you, and to the left. This will help create a more ‘vertical’ dough, ready for proofing. See my demonstration here: http://www.youtube.com/watch?v=rDoJRCMfclE
6. Heavily flour a banneton/proofing basket with whole wheat flour and rest your dough, seam side up, in the basket. Put the basket in a large plastic bag, inflate it, and seal it. Set aside somewhere warm for 3-5 hours, or until it has expanded a fair bit. It is ready to bake when the dough responds to a gently poke by slowly pressing back to shape.
7. Preheat the oven to hot 425°F/220°C/gas mark 7. Line a baking sheet with parchment, then carefully invert the dough onto the sheet. I like to put the baking sheet on top of the basket, then gently flip it over so as to disturb the dough as little as possible. Make 2-3 cuts on top of the loaf and bake for 40-50 minutes, reducing the temperature to moderately hot 400°F/200°C/gas mark 6 after 10 minutes.
8. Cool on a cooling rack.
A wheat loaf, with a slightly rumpled crust.
Rice, Brazil Nut, and Flaxseed Dough
Servings: 1 small loaf plus extra rice starter for further baking
Rice Starter - Day 1:
Ingredients
3 tablespoons plus 1 teaspoon (50 ml) (30 gm/1 oz) brown rice flour
3 tablespoons less 1 teaspoon (40 ml) water (86°F/30°C)
Total 6 tablespoons (90 ml) (70 gm/2½ oz)
Directions:
1. 1. In a Tupperware or plastic container, mix the flour and water into a paste.
2. Set the lid on top gently, cover with a plastic bag, to prevent messes in case it grows more than expected!
3. Set somewhere warm (around 86°F/30°C if possible). I sometimes put mine on a windowsill near a radiator, but even if it’s not that warm, you’ll still get a starter going – it might just take longer.
Rice Starter - Day 2:
Ingredients
3 tablespoons plus 1 teaspoon (50 ml) (30 gm/1 oz) brown rice flour
3 tablespoons less 1 teaspoon (40 ml) water (86°F/30°C)
6 tablespoons (90 ml) (70 gm/2½ oz) starter from Day 1
Total ¾ cup (180 ml) (140 gm/5 oz)
Directions:
1. Stir the flour and water into the mixture from Day 1, cover, and return to its warm place.
Rice Starter - Day 3:
Ingredients
3 tablespoons plus 1 teaspoon (50 ml) (30 gm/1 oz) brown rice flour
3 tablespoons less 1 teaspoon (40 ml) water (86°F/30°C)
¾ cup (180 ml) (140 gm/5 oz) starter from Day 2
Total 1 cup plus 2 tablespoons (270 ml) (210 gm/7½ oz)
Directions:
1. Stir the flour and water into the mixture from Day 2, cover, and return to its warm place.
Rice Starter - Day 4:
Ingredients
5 tablespoons (75 ml) (45 gm/1? oz) brown rice flour
3 tablespoons plus 1 teaspoon (50 ml) water (at 86°F/30°C)
1 cup plus 2 tablespoons (270 ml) (210 gm/7 ½ oz) starter from Day 3
Total scant 1 2/3 cups (395 ml) (305 gm/10¾ oz)
Directions:
1. Stir the flour and water into the mixture from Day 3, cover, and return to its warm place. At this point it should be bubbling and smell yeasty. If not, repeat this process for a further day or so until it is!
Rice, Brazil Nut, and Flaxseed Bread
Stage 1: Soaking the flaxseeds
Ingredients
2 tablespoons (30 ml) (25 gm/1 oz) flaxseeds
3 tablespoons plus 1 teaspoon (50 ml) water (cold)
Total ? cup (80 ml) (75 gm/2 ? oz)
Directions:
1. Rinse the seeds in fresh water, drain, then add them to the cold water. Cover and soak overnight at room temperature.
Rice, Brazil Nut, and Flaxseed Bread
Stage 2: Production Sourdough
Ingredients
6½ tablespoons (100 ml) (75 gm/2? oz) rice sourdough starter
½ cup (120 ml) (70 gm/2 ½ oz) brown rice flour
1/3 cup plus 1 teaspoon (85 ml) water (at 96°F/35°C)
Total 1¼ cup plus 1 teaspoon (305 ml) (230 gm/8 oz)
Directions:
1. Mix everything together, cover, and leave in warm place for 2-3 hours. It is ready when it has risen a bit and is bubbling.
Rice, Brazil Nut, and Flaxseed Bread
Stage 3: Final Dough
Ingredients
3/4 cup plus 1 tablespoon (195 ml) (150 gm/5 ? oz) production sourdough
3 tablespoons (45 ml) (20 gm/¾ oz) cornstarch
1 tablespoon (15 ml) (10 gm/? oz) buckwheat flour
1/2 cup (120 ml) (75 gm /2 ? oz) brown rice flour
3 tablespoons (45 ml) (20 gm/¾ oz) tapioca flour
2 teaspoons (10 ml) (10 gm/ ? oz) carob bean gum (optional)
2 teaspoons (10 ml) cider vinegar
1/3 cup (80 ml) (50 gm/1 ¾ oz) Brazil nuts, chopped (optional)
1 medium (50 gm) egg
1 teaspoon (5 ml) (5 gm/.2 oz) sea salt or ½ teaspoon (2½ ml) (2½ gm/.1 oz) table salt
2 tablespoons plus 1 teaspoon (35 ml) water (86°F/30°C)
? cup (80 ml) (75 gm/2 ? oz) soaked flaxseeds (from above)
Total 2¾ cups plus 2 tablespoons (690 ml) ( 510 gm/18 oz/1 lb 2 oz)
sunflower oil or olive oil for brushing
Directions:
1. Mix all the ingredients together to form a very soft dough. With wet hands, pick up the dough and smooth it like clay on a potter’s wheel (shaping it into a round, smooth ball with your hands). Drop the mixture into a well-greased small loaf tin.
2. Cover with a plastic bag, inflate, and seal. Set aside somewhere warm for up to 5 hours, or until the loaf has expanded most of the way up the tin.
3. Brush the top of the loaf carefully with sunflower or olive oil. This helps it to brown in the oven.
4. Preheat your oven to moderately hot 410°F/210°C/gas mark 6 and bake the loaf for 30 minutes. It is done when it shrinks away from the sides of the pan a bit, or if a skewer inserted comes out clean.
Garlic and Oregano Roasted Mushrooms and Pancetta on Toasted Sourdough
Servings: 4
Ingredients
4 large or 8 medium field mushrooms, sliced
2 red onions, peeled and cut into wedges
2 garlic cloves, peeled and sliced
4 sprigs oregano, leaves only
100 gm (3 ½ oz) pancetta, cubed (optional)
2 tablespoons (30 ml) extra virgin olive oil
4 slices sourdough bread
butter, for spreading
freshly ground black pepper
sea salt
Directions:
1. Preheat the oven to moderately hot 400°F/200°C/gas mark 6. Place the mushrooms on an oiled baking sheet, with onion wedges scattered beneath them. Sprinkle over the garlic, oregano, and pancetta, drizzle with olive oil and season with black pepper and sea salt. Roast for 25 minutes until the mushrooms are tender.
2. Toast your bread in the toaster. Butter the toast, and then pile your mushroom mixture on top.
A Twist: Instead of roasting your mushrooms, you can also sauté them in a pan and, just before serving, stir in a dash of cream for a rich, warm treat!
Welsh Rarebit (Cheese on Toast)
Servings: 4
Ingredients
½ cup (120 ml ) milk
3 tablespoons (45 ml) pale ale (optional)
2 tablespoons (30 ml) (30 gm/1 oz) butter
3 tablespoons (45 ml) (30 gm/1 oz) plain white flour
2 cups (480 ml) (150 gm/5 ? oz) mature cheddar, grated
2 teaspoons (10 ml) Worcestershire sauce (not vegetarian - optional)
1 egg yolk
2 tablespoons (30 ml) grainy mustard
4 thick slices bread
Directions:
1. Preheat the grill/broiler. Warm the milk and ale in a saucepan.
2. Melt the butter in another pan, then add the flour and stir for 2 minutes. Whisk in the hot milk mixture and cook, stirring constantly, until thickened and smooth.
3. Remove the sauce from the heat, and beat in the cheese, Worcestershire sauce, egg yolk, and grainy mustard.
4. Toast the bread under the grill.
5. Spread over the cheese mixture and grill/broil until golden brown and bubbly.
Notes: Guinness is a good alternative to ale. If you like ketchup on your cheese-on-toast, spread a bit on the toast before spreading over the cheese mixture! The cheese mixture can be made in advance and stored in the fridge.
Storage & Freezing Instructions/Tips:
Sourdough is really easy to store – it will keep for about two days wrapped in a paper bag, so you may find it helpful to freeze half of a loaf for later use. I sometimes store mine wrapped in a tea towel, in a plastic bag which has been left open (or else it goes soggy), and it keeps for 4-5 days this way. The rye bread will keep really well for about 5 days wrapped this way, because rye retains more moisture than wheat.
The baked loaves freeze very well for about 3 months. Wrap tightly in plastic wrap and then foil, or plastic wrap and then place in freezer bag. Do not store in door of freezer as it will become freezer burnt. Thaw overnight in the fridge with the wrapping on, or for a few hours on a counter top, but take the wrapping off so no moisture will condensate on the crust.
Additional Information:
Andrew Whitley’s bread tips:
http://breadmatters.com
Though this video shows a yeasted bread, the technique demonstrated is exactly what is used for most wheat-based sourdoughs. http://www.guardian.co.uk/lifeandstyle/wordofmouth/video/2010/jul/20/how...
General bread tips:
http://www.thefreshloaf.com/
Gluten-free sourdough tips can be found here:
http://www.sanctuary-healing.com/food-as-medicine.html
Tips on making homemade bannetons/proofing baskets here: http://www.thefreshloaf.com/node/5030/home-made-bannetons
If you have access to it, Shipton Mills in the UK does some of the nicest flour for sourdough:
http://www.shipton-mill.com/
In North America, King Arthur do great flour as well:
http://www.kingarthurflour.com/
Some things to do with toast:
http://www.mrbreakfast.com/article.asp?articleid=20
Disclaimer:
The Daring Kitchen and its members in no way suggest we are medical professionals and therefore are NOT responsible for any error in reporting of “alternate baking/cooking”. If you have issues with digesting gluten, then it is YOUR responsibility to research the ingredient before using it. If you have allergies, it is YOUR responsibility to make sure any ingredient in a recipe will not adversely affect you. If you are lactose intolerant, it is YOUR responsibility to make sure any ingredient in a recipe will not adversely affect you. If you are vegetarian or vegan, it is YOUR responsibility to make sure any ingredient in a recipe will not adversely affect you. The responsibility is YOURS regardless of what health issue you’re dealing with. Please consult your physician with any questions before using an ingredient you are not familiar with. Thank you!