Challah is
a bread of celebration in Jewish tradition. At a time when white flour was
considered a luxury, its use was reserved for either the wealthy or for festive
events. In Judaism, the Sabbath is a weekly holiday, and therefore is a festive
occasion. It was around the 15th century when Jews in parts of Austria and Germany adopted an oval braided
loaf from their neighbors to make the Sabbath special. These fancy shaped
loaves made with white flour were seen as a fitting way to honor the Shabbat
(Sabbath), symbolized in Jewish culture as a queen, therefore deserving of the
finest one can achieve. In honoring the Sabbath as a day of rest, two loaves
are traditionally put on the table. This is generally seen as a representation
of the double portion of manna provided to the Children of Israel on Fridays
during their wandering in the desert after fleeing from Egypt. This
double portion allowed them to maintain the commandment to not do “work” on the
Sabbath.Another symbolic comparison to the manna eaten by the Israelites is the
fact that challah is traditionally covered with a cloth prior to being blessed
and eaten. According to tradition, manna was encased in dew to preserve its
freshness. Covering the challah with a decorative cloth serves as another
reminder of the special quality of the day of rest. There are other
explanations given regarding why the challah is covered. The one which I always
liked was that we cover the loaves so they will not be “embarrassed” by having
to wait while the wine is blessed first. (A traditional Sabbath dinner begins
with a blessing over the wine first, followed by the blessing of the bread,
after which the meal is enjoyed.)
Recipe
Source: The recipes provided for the challenge came from or were inspired by
recipes found through a variety of online sources (including, but not limited
to allrecipes.com). Also invaluable was the book “A Taste of Challah,” by Tamar
Ansh.
Blog-checking
lines: May’s Daring Bakers’ Challenge was pretty twisted – Ruth from The Crafts
of Mommyhood challenged us to make challah! Using recipes from all over, and
tips from “A Taste of Challah,” by Tamar Ansh, she encouraged us to bake
beautifully braided breads.
Posting
Date: May 27, 2012
Notes: What
makes challah truly stand out is the distinctive braid. There are many ways,
though, in which challah can be shaped. While the recipes are important to this
type of bread, it really is the shaping which makes it special. Braiding is an
intertwining of separate pieces into one combined entity. This is symbolic of
the intertwining of the everyday and the holy, and of the coming together of
family and friends. Some notes about the most common braids and shapes:
Three
strand braid: This is the easiest of the braids – especially if you have ever
braided hair. Many attribute a word to each of the three strands used: zachor
(remember), shamor (observe or guard), and b’dibur echad (with one word). The
braiding of the three words is a physical reminder of the importance of
remembering and observing the Sabbath as one commandment.
Four strand
braid: There is not a lot of information written as to the cultural
significance of the four strands. Rather, it is viewed as a way to elaborate on
the more common three strand braid in order to fulfill the obligation to
beautify the commandment and make it more special.
Six strand
braid: There are traditionally two challah loaves on the Sabbath table. Using
the six strand braid, that brings twelve pieces to the table. These twelve
strands can be symbolic of the twelve tribes of the Children of Israel. Many
also use the twelve pieces to represent the twelve “showbreads” used in the
Jewish Temple on special occasions.
Four strand
braided round: Traditionally used on the Jewish New Year, round breads have no
beginning and no end. They are used as an example of the cycle of life, the
cycle of the year, and the continuity of the Jewish calendar.
Other
common shapes: Challah is shaped in a variety of ways for different Jewish
holidays. Prior to fasting on Yom Kippur, the Day of Attonement, many people
eat loaves shaped like ladders to symbolize the desire to rise up to greater
heights. On Shavuot, the holiday commemorating receiving the ten commandments,
loaves can be shaped like tablets. Bird shaped challah loaves are symbols of
protection and forgiveness.
Making
strands: There are two basic methods for forming the strands used to braid
challah. The first, and easiest, is to simply roll snakes between your hands
like when working with clay or play dough. The second method is to use a
rolling pin to roll out a flat disc of dough, then using your hands to roll the
disc into a snake, rolling the snake on the counter with your fingers to
achieve the length you need. This second method does result in a better rise,
but either way works well. Whichever method you use, form your strands such
that they are thinner at the ends and fuller in the middle. This will help your
challah rise in the center.
Tip: If you
are new to braiding – do yourself a favor and practice before you shape your
dough! Over working the dough will make for a tough loaf. Practice your
braiding or shaping with clay or play dough first in order to become more
comfortable. Videos of how to do a variety of braids can be found in the
additional information section.
Egg Wash: Egg wash is used to enhance the
top crust of the challah. It adds shine and crispness, and enhances the beauty
of the breads. While a single coat is sufficient, a double coat works
beautifully. Brush your beaten egg and water mixture on the loaves directly
after shaping, then allow to proof. Brush again just before baking, adding any
toppings you were planning to use.
Mandatory
Items: You must make an enriched bread which is braided or shaped. If you must
use a loaf pan, the bread should be braided before it goes into the pan. Videos
of several braiding methods are in the additional information section, and
other tutorials are available on-line. (The videos were done with four
wonderful children – mine and my sister’s- playing in the background, sorry if
they were distracting!)
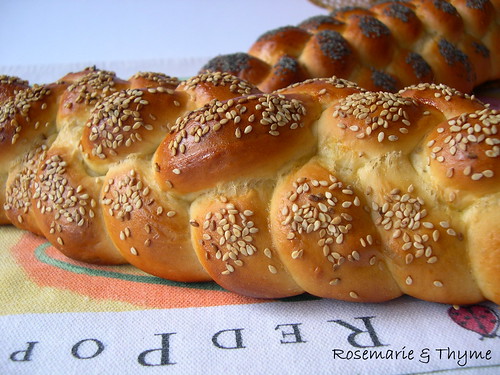
Variations
allowed: Challah comes in many different shapes, sizes and flavors. Raisins,
chocolate chips and other additions can be kneaded into the dough, loaves can
be topped with poppy seeds, sesame seeds, vanilla sugar or other flavorful
sprinklings, and filled challahs can be a lot of fun and very tasty, too!
Braiding and shaping, though, become more difficult when the rolled strands
have fillings in them. Use your own discretion and comfort level to determine
what degree of difficulty you are ready for. Gluten free and egg free bakers
can use the recipe links in the additional information section, or use other
substitutions with which you are comfortable. (All of the recipes provided here
are dairy free, as Jewish dietary laws prohibit eating dairy and meat at the
same meal. If you prefer not to use margarine, unsalted butter can be
substituted.)
Preparation
time: As a general rule, challah takes about 4-6 hours from start to finish.
This includes making the dough, at least two risings, baking and cooling.
Specific recipes take slightly different amounts of time, and the first rise
can be done overnight in the refrigerator if you prefer. Please read through
the recipes for specific times. Following are approximates for most.
Mixing and
kneading the dough: 20 min.
First rise:
1 ½ to 2 hours
Punching
down, second rise: 1 hour (not all recipes have this second rise)
Shaping: 10
to 20 min.
Third rise
(second rise for some recipes): 1 hour
Baking: 30
to 45 minutes
Cooling: 20
to 30 minutes.
Equipment
required:
• Stand mixer with dough hook (not
necessary, but it certainly helps!)
• Measuring cups
• Measuring spoons
• Mixing bowls (at least one large and
one small)
• Pastry brush
• Rolling pin (again, not necessary, but
it makes a difference)
• Baking tray/cookie sheet
• Parchment paper
• Kitchen/tea towel
• Cooling rack
• Offset spatula (really helps get the
loaves off of the tray safely!)
Ruth’s
“Go-To” Whole Wheat Challah
(adapted
from D’s Whole Wheat Challah)
Servings:
12
Ingredients
2 (.25 oz.) packages (4½
teaspoons) (22½ ml) (15 gm)
(½ oz) dry yeast
1 cup (240
ml) warm water (100°F/38°C)
½ cup (120
ml) (100 gm)
(3½ oz) brown sugar, firmly packed
½ cup (one
stick) (120 ml) (115 gm/4 oz) margarine or unsalted butter – room temperature
2 tsp. (10
ml) (15 gm)
(½ oz) salt
3 large
eggs
2 cups (480
ml) (280 gm/10 oz) whole wheat flour
2 cups (480
ml) (280 gm/10 oz) all-purpose flour
½ cup (120
ml) (50 gm)
(1¾ oz) rolled oats (Old Fashioned work just fine!)
Additional
flour for kneading (½ to 1 cup) (120 to 240 ml) (70 to 140 gm) (2½ to 5 oz)
1 egg
beaten with 1 tsp. water for glaze
Directions:
1. In the bowl of your stand mixer,
dissolve yeast in warm water. Allow to stand about 5 minutes until
creamy/foamy.
2. With paddle attachment beat 3 eggs,
sugar, margarine (or butter), whole wheat flour, all purpose flour and oats
into the yeast mixture. Or, if mixing by hand (ok, spoon), combine eggs and
margarine/butter with yeast mixture until well mixed. Add flours and oats and
mix until it becomes difficult to mix.
3. Once combined, switch to the dough hook
and knead for 5 to 10 minutes until smooth and elastic, adding flour as/if
needed. If kneading by hand, this should take about 10-12 minutes.
4. Form dough into a round, compact ball.
Turn in oiled bowl, cover with a kitchen/tea towel. Let rise in warm area (I
put it in the oven with the light on) until doubled, approx. 2 hours.
5. Once dough has doubled, punch down.
Recover with towel, allow to rise again for an hour, but even 30 minutes will
be fine if you’re in a hurry.
6. Punch the dough down again, divide in
two.
7. Shape each half as desired (3, 4 or 6
strand braid, rolls, etc.). Place shaped loaves onto parchment covered baking
trays. Cover with the towel and allow to rise another hour.
8. Preheat oven to 350 degrees.
9. Brush loaves with egg wash. (Sprinkle
with vanilla sugar/sesame seeds/poppy seeds/other topping here if desired)
10. Bake 30 to 40 min. until the loaf sounds
hollow when tapped on the bottom.
11. Transfer loaves to a wire rack to cool
before serving.
Challah
(Honey White)
(from
Tammy’s Recipes)
Servings: 2
loaves
Ingredients
1 ½ cups
(360 ml) warm water, separated
1 Tbsp. (15
ml) (15 gm/½ oz sugar
2 Tbsp.
(2-2/3 packets) (30 ml) (18 gm)
(2/3 oz) dry active yeast
½ cup (120
ml) honey
1 Tbsp. (15
ml) oil (light colored vegetable oil, or olive oil if you prefer)
4 large
eggs
1 ½ tsp. 7½
ml) (9 gm)
(1/3 oz) salt
5 cups
(1200 ml) (700 gm/25 oz) all-purpose (plain) flour, plus more as needed (up to
8 or 9 cups total)
1 egg
beaten with 1 tsp. water
Directions:
1. In mixer bowl/large mixing bowl combine
½ cup warm water, 1 Tbsp. sugar and 2 Tbsp. yeast. Allow to proof approximately
5 minutes until foamy.
2. To the yeast mixture add the remaining
water, honey, oil, eggs, salt and 5 cups of flour. Knead (by hand or with your
mixer’s dough hook) until smooth, adding flour as needed. Knead for
approximately 10 minutes.
3. Transfer dough to a clean, oiled bowl,
turn to coat or add a bit more oil on top. Cover bowl with a kitchen/tea towel.
Leave to rise in a warm place until doubled, about 1 ½ hours.
4. Punch down the dough, divide it into
two sections. Use one half to make each loaf (shaped or braided as desired).
5. Place loaves on parchment lined or
greased baking sheets, cover with a towel, allow to rise 30 minutes.
6. Preheat oven to 325 degrees.
7. Brush tops loaves with egg wash.
(Sprinkle with seeds or toppings here if wanted.)
8. Bake loaves 30-40 minutes until done.
9. Cool on wire racks.
Easy
Challah
(from
templedavid.org)
Ingredients
4 cups (960
ml) (360 gm/20 oz) all-purpose (plain) flour
1 cup (240
ml) warm water
1 package
(2¼ teaspoons) (11¼ ml) (7 gm)
(¼ oz) package rapid rise yeast
½ (120 ml)
(115 gm/4 oz) cup sugar
2 large
eggs
1 tsp. (5
ml) (6 gm)
salt
1 egg
beaten with 1 tsp. water
Directions:
1. Measure flour, sugar and salt into a
large mixing bowl.
2. In a separate bowl (or in the bowl of
your stand mixer) combine water and yeast, allow to sit 5 minutes until foamy.
3. Add 1 ½ cups of the flour mixture to
the water and yeast mixture, beat until well combined. Cover with a dish towel,
let stand 30 min.
4. Add two eggs to the dough, beat again.
5. By hand or with your dough hook knead
in the remaining flour mixture. Knead approximately 10 minutes.
6. Transfer to oiled bowl, cover, let rise
one hour.
7. Punch down dough, knead approximately 3
minutes.
8. Divide dough in two. Shape each half as
desired (3, 4, or 6 strand braid).
9. Place loaves on parchment covered or
greased cookie sheets, cover with a towel, allow to rise one hour.
10. Preheat oven to 400 degrees.
11. Brush loaves with egg wash.
12. Bake at 400 degrees for 10 minutes.
Reduce oven temperature to 375 degrees, bake until golden crust forms (about
25-30 minutes).
13. Transfer to a wire rack to cool.
Storage
& Freezing Instructions/Tips:
Once
cooled, challah loaves which will not be eaten right away (or in the next
couple of days) should be bagged in heavy duty freezer bags. Remove excess air
from the bag before securing it tightly (tying a knot or using tape). Put the
bagged loaf/loaves into the freezer as soon as possible to ensure fresh taste;
frozen challah will keep approximately three months.
Additional
Information:
Egg free
recipes: This recipe uses baking powder for the egg-replacer. The resulting
loaves were light and fluffy, and tasted better than I thought they would!
http://www.vegkitchen.com/recipes/special-occasions-and-entertaining/jew...
This recipe
uses a more common egg replacer – flax seed meal. It was a tougher dough than I
was used to using, but the resulting loaves were light, and looked beautiful
with the flax speckles.
http://thatsonetoughcookie.com/2009/06/22/olive-oil-flax-seed-vegan-chal...
Gluten free
recipes:
http://www.epicurious.com/recipes/member/views/GLUTEN-FREE-CHALLAH-PAREV...
http://celiacdisease.about.com/gi/o.htm?zi=1/XJ&zTi=1&sdn=celiacdisease&...
Videos:
These videos were made in my kitchen. The kids – mine and my sister’s were
running around. So it is totally a real world view, no fancy tricks happening!
Video of
basic three strand braid:
http://s1075.photobucket.com/albums/w440/tinkrsh/challah%20braiding/?act...
Videos of
four strand braids:
http://s1075.photobucket.com/albums/w440/tinkrsh/challah%20braiding/?act...
http://s1075.photobucket.com/albums/w440/tinkrsh/challah%20braiding/?act...
Videos of
six strand braids:
http://s1075.photobucket.com/albums/w440/tinkrsh/challah%20braiding/?act...
http://s1075.photobucket.com/albums/w440/tinkrsh/challah%20braiding/?act...
Video of
four strand braided round: http://s1075.photobucket.com/albums/w440/tinkrsh/challah%20braiding/?act...
Additional
resources:
http://www.atasteofchallah.com/
Just a
quick thank you to my sister Shelley, C Mom Cook, for your help in
photographing, videoing, and editing this challenge. I appreciate your input
and that of your kiddos, too!
Disclaimer:
The Daring
Kitchen and its members in no way suggest we are medical professionals and
therefore are NOT responsible for any error in reporting of “alternate
baking/cooking”. If you have issues with digesting gluten, then it is YOUR
responsibility to research the ingredient before using it. If you have
allergies, it is YOUR responsibility to make sure any ingredient in a recipe
will not adversely affect you. If you are lactose intolerant, it is YOUR
responsibility to make sure any ingredient in a recipe will not adversely
affect you. If you are vegetarian or vegan, it is YOUR responsibility to make
sure any ingredient in a recipe will not adversely affect you. The
responsibility is YOURS regardless of what health issue you’re dealing with.
Please consult your physician with any questions before using an ingredient you
are not familiar with. Thank you!
__________________
Ruth H.
www.mommy-crafts.blogspot.com
P