Quick bread is a favourite of mine and when I saw that this month's challange meant preparing one I was really interested.
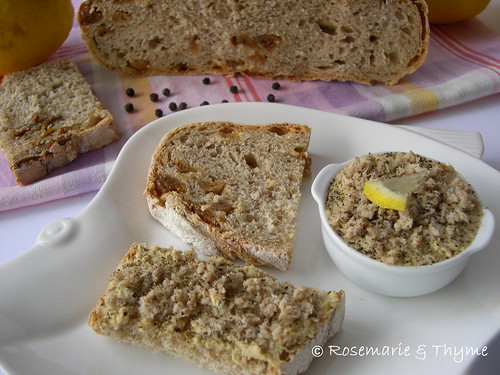
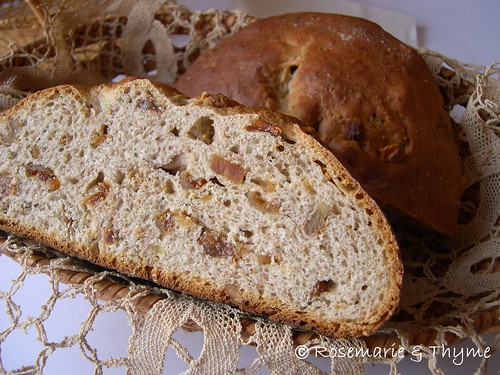
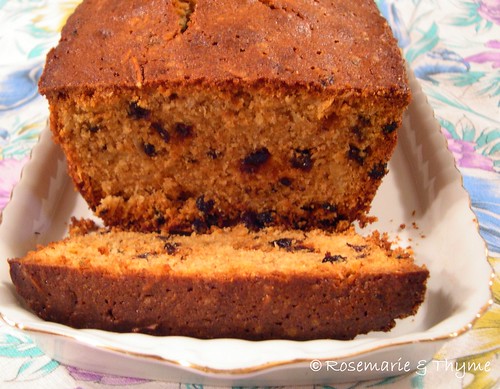
I decided to post this recipe from an Australian book I picked up in Sydney a long time ago. It has a fresh scent of orange, it's made with wholemeal flour and brown sugar and you might like to decide which brown sugar to use bringing out a different flavour. The addition of currants (very difficult to find here, I have a special pusher) and almonds is great! It's lovely with a hot cup of tea or coffee, and served with fresh orange juice isn't bad at all :))
I don't know yet in what order I will be making the deliscious recipes that Liz gave us, but I will make all of them! Ingredients are already beeing acquired :)). Maybe the savoury one will be the first, I'll let you know!
Thanks Liz, for all the incredible work!
ORANGE BLOSSOM CAKE
from The Complete Book of Baking
Ingredients
125 g ./ 4oz/ 1/2 cup butter,
225 g./7oz/ 1 cup brown sugar,
250 ml./8.45 US fl.oz./1/2 cup milk,
3 yolks,
3 teaspoons of orange blossom water,
255 g./2 cups/9oz/ of wholemeal flour,
2 teaspoons of baking powder,
1/2 teaspoon salt,
1/2 teaspoon of ground clove,
1 cup slivered blanched almonds,
140 g./5oz./1 cup of currants,
2 tablespoons of grated orange rind,
3 egg whites, stifly beaten
Directions
Preheat the oven to 180°C(350°F/gas4). Grease a large loaf tin. Blend the butter and sugar together well. Add the milk, egg yokes and orange blossom water. Into a separate bowl, sift together the flour, baking powder, salt and ground clove then add this to the mixture and beat well. Add the almonds, currants and orange rind;mix well. Fold in the stifly beaten egg whites. Spread into the tin.
Bake for 35 to 45 minutes or until a toothpick inserted near the center comes out clean. Turn out of the tin onto a wire rack. The cake can be glazed while it is hot. Otherwise it can simply be sprinkled with finely chopped mixed peel.
GLAZE:
1/2 cup of orange marmelade,
90 ml of water,
Sieve the orange marmelade through a food mill. Place it in a small pan, add the water, heat gently until it starts boiling, lower the heat and let it simmer for 4 - 5 minutes, add the brandy and the orange peel cook on gentle heat for another 4 o 5 minutes.
TORTA ALL’ESSENZA DI FIORI D’ARANCIO
125 g .
di burro,
225 g. di zucchero di canna,
I don't know yet in what order I will be making the deliscious recipes that Liz gave us, but I will make all of them! Ingredients are already beeing acquired :)). Maybe the savoury one will be the first, I'll let you know!
Thanks Liz, for all the incredible work!
ORANGE BLOSSOM CAKE
from The Complete Book of Baking
Ingredients
225 g./7oz/ 1 cup brown sugar,
250 ml./8.45 US fl.oz./1/2 cup milk,
3 yolks,
3 teaspoons of orange blossom water,
255 g./2 cups/9oz/ of wholemeal flour,
2 teaspoons of baking powder,
1/2 teaspoon salt,
1/2 teaspoon of ground clove,
1 cup slivered blanched almonds,
140 g./5oz./1 cup of currants,
2 tablespoons of grated orange rind,
3 egg whites, stifly beaten
Directions
Preheat the oven to 180°C(350°F/gas4). Grease a large loaf tin. Blend the butter and sugar together well. Add the milk, egg yokes and orange blossom water. Into a separate bowl, sift together the flour, baking powder, salt and ground clove then add this to the mixture and beat well. Add the almonds, currants and orange rind;mix well. Fold in the stifly beaten egg whites. Spread into the tin.
Bake for 35 to 45 minutes or until a toothpick inserted near the center comes out clean. Turn out of the tin onto a wire rack. The cake can be glazed while it is hot. Otherwise it can simply be sprinkled with finely chopped mixed peel.
GLAZE:
1/2 cup of orange marmelade,
90 ml of water,
2 tablespoons of thinly sliced orange peel,
2 tablespoons of brandy.
2 tablespoons of brandy.
Sieve the orange marmelade through a food mill. Place it in a small pan, add the water, heat gently until it starts boiling, lower the heat and let it simmer for 4 - 5 minutes, add the brandy and the orange peel cook on gentle heat for another 4 o 5 minutes.
Spread the glaze on the cake while it is still hot. Sprinkle with the orange peel.
TORTA ALL’ESSENZA DI FIORI D’ARANCIO
250 ml di latte,
3 tuorli,
3 cucchiaini di essenza di fiori d’arancio,
300 g .
di farina integrale,
2 cucchiaini di lievito per dolci,
mezzo cucchiaino di sale,
mezzo cucchiaino di chiodi di garofano in polvere,
130 g .
di mandorle a scaglie,
135 g .
di uvetta di Corinto,
2 cucchiai di buccia d’arancia grattugiata,
3 albumi ben montati a neve.
Scaldare il forno a 180°. Imburrare una tortiera rettangolare. Lavorare il burro e lo zucchero. Aggiungere il latte, i tuorli uno per volta e l’essenza di fiori d’arancio. Separatamente setacciare la farina, il lievito, il sale e la polvere di chiodi di garofano, poi aggiungere all’impasto e amalgamare. Aggiungere le mandorle, l’ uvetta di Corinto, la buccia d’arancia grattugiata, gli albumi montati a neve. Versare nella teglia e cuocere in forno per 35-45 minuti o o fin quando inserendo uno stecchino ne esca asciutto. Far raffreddare su una gratella. Glassare quando la torta è ancora calda. Altrimenti si può guarnire con frutta candita tritata finemente.
3 tuorli,
3 cucchiaini di essenza di fiori d’arancio,
2 cucchiaini di lievito per dolci,
mezzo cucchiaino di sale,
mezzo cucchiaino di chiodi di garofano in polvere,
2 cucchiai di buccia d’arancia grattugiata,
3 albumi ben montati a neve.
Scaldare il forno a 180°. Imburrare una tortiera rettangolare. Lavorare il burro e lo zucchero. Aggiungere il latte, i tuorli uno per volta e l’essenza di fiori d’arancio. Separatamente setacciare la farina, il lievito, il sale e la polvere di chiodi di garofano, poi aggiungere all’impasto e amalgamare. Aggiungere le mandorle, l’ uvetta di Corinto, la buccia d’arancia grattugiata, gli albumi montati a neve. Versare nella teglia e cuocere in forno per 35-45 minuti o o fin quando inserendo uno stecchino ne esca asciutto. Far raffreddare su una gratella. Glassare quando la torta è ancora calda. Altrimenti si può guarnire con frutta candita tritata finemente.
Glassa
1/2 tazza di marmellata d’arancia
90 ml di acqua
striscioline sottili di buccia di arancia
2 cucchiai di brandy
Passare al passaverdura la
marmellata mettere in un pentolino basso, aggiungere l’acqua e la buccia di arancia,
scaldare lentamente fin quando inizia a bollire , abbassare la fiamma far
cuocere 4 o 5 minuti, aggiungere il brandy e la buccia d'arancia e cuocere a fuoco lento per altri 4
o 5 minuti.
Passare la glassa sulla torta
ancora calda. Guarnire con le striscioline di buccia di arancia.
_____________________________________________________________
And now to introduce you to this month’s host…It's none other than Liz the proud blogger of La mia Cucina herself and coauthor of Daring Bakers and here is what she wrote for us:
Hi! It’s me! *grin* Yes, I’m your host this
month! Our scheduled host couldn’t be here, so I decided that it was high time
I hosted a challenge myself. (Okay not really, I have no business hosting, but
there wasn’t enough time to ask someone else! Shhhhh..) Now keep in mind, I am NOT a baker.. cooking
is my bag. I love to play around with baking, but give me some beef to braise,
some veggies to roast or some fish to filet and I am in heaven. So your
challenge this month is going to rely on your creative skills and not my mad
baking skillz. hee!
I’ve chosen to go with quick breads!
Epicurious’ definition is as follows:
Quick Bread
Bread that is quick to make because it doesn't
require kneading or rising time. That's because the leavener in such a bread is
usually baking powder or baking soda, which, when combined with moisture,
starts the rising process immediately. In the case of double-acting baking
powder, oven heat causes a second burst of rising power. Eggs can also be used
to leaven quick breads. This genre includes most biscuits, muffins, popovers
and a wide variety of sweet and savory loaf breads.
I’d like ya’ll to concentrate on loaves or
muffins. I’m going to supply you with a base recipe and a few other recipes that
I’ve made over the past few weeks and you can use any of them as written or as
a foundation to build upon a new flavor – OR – you can use any quick bread
recipe you like.. all I’m asking is that you stick to the same principles that
I did:
No yeast
Can’t take more than 1.5 hours to prepare and
bake through.
Only loaves or muffins/popovers
Recipe Source: The basic quick bread recipe is
from Sara Schewe. The prune bread recipe was my Aunty Ann’s recipe. The Meyer
Lemon Loaf and Green Onion, Cheddar & Asiago Beer Batter Bread were adapted
from Recipe Girl. The Pumpkin Bread with Maple Cream Cheese Filling was adapted
from Dana Ramsey’s recipe located on Just a Pinch Recipe Club.
Blog-checking lines: The Daring Bakers’
February 2012 host was – Lis! Lisa stepped in last minute and challenged us to
create a quick bread we could call our own. She supplied us with a base recipe
and shared some recipes she loves from various websites and encouraged us to
build upon them and create new flavor profiles.
Posting Date: February 27, 2012
Note: Kids.. I don’t have any specific notes,
I’m not kidding when I say I’m not a baker. I don’t have the patience or the
skills. My palms sweat when I have to bake. This is why I live vicariously
through all of you extremely talented folks. This is why I beg many of you to
send me baked goods through the mail. Hee! I’m taking over this month because I
had to (and I won’t lie, it sounded fun after I went to my BFFs and told them
my predicament & then got all excited while we were talking about it) not
because I thought I could share with you any wise baking advice. *grin*
So all I can say is, learn from my mistakes:
Read a recipe twice before even gathering your
ingredients.
Most of the recipes say to check with a
toothpick.. When making loaves, I’d use a wooden skewer or a long cake tester
if you can get your hands on them.
Always start checking for doneness a good 5 to
7 minutes before the allotted time the recipe calls for.
Don’t allow the dogs (especially the wee lil
ankle biters) to join you in your baking adventures.. they are very
trip-overable.
Also, pre-heat the oven and grease up your pans
before you start getting your hands dirty. My husband yells when I get batter
all over the stove, so this will help prevent your spouses from
yelling at you.
Mise en place (having everything ready to cook)
is also highly recommended although I can never remember to do it.. therefore I
usually have a good 2
inches of flour and butter and other assorted ingredients
caked on my counters because I’m fumbling over bags, bottles and cartons to get
to what I need.
And finally, the most important tip/note I can
pass along to you is.. DO NOT start cursing the Baking Gods for any mistakes or
bad outcomes you may have. They don’t like it.. they don’t stand for it..
and they will cause big, billowy, black smoke
clouds to waft through your oven’s door and vents. Then they laugh at you. And
point accusingly. It’s embarrassing. So when you get mad (not that anyone will
get upset over this challenge.. it’s easy peasy!) leave the room so they can’t
hear you and rip them a new one out of earshot. Trust me on this.
This isn’t a tip but I’m just forewarning you..
I’m as much of a photographer as I am a baker.. so don’t be scrolling below in
hopes of finding jaw dropping (in the good way) photos.
THIS CHALLENGE IS MEANT TO BE FUN – DON’T TAKE
ANYTHING TOO SERIOUSLY.. RELAX IN THE KITCHEN.. DON’T START ANY FIRES AND BY
ALL MEANS IF YOUR QUICK BREADS TURN OUT BEAUTIFULLY, MAIL ME A LOAF!!!! xoxoxo
I was feeling that although I firmly believe
this challenge should be about fun and creativity (I mean it IS quick bread
after all), that it really wasn’t very informative.. and voiced my concern to
Aud, who came up with what follows (bless your cotton socks, Aud! xoxo):
Quick bread primer
Quick breads can be sweet or savory, they are a
modern innovation they became common after the introduction of baking powder
and baking soda.
Baking powder is a combination of acid and
alkaline that reacts together when moistened to form gases that raises the
baked quick bread. Usage 1 to 2 teaspoons per cup of flour.
Baking soda (an alkaline salt, sodium
bicarbonate) is used when the liquid is acidic, such as buttermilk, honey,
molasses, tomato sauce etc. Usage ½ to 1 teaspoon per cup of acidic liquid.
Be sure your baking powder and baking soda are
fresh.
Measure ingredients accurately, using the
measuring tools and techniques suggested.
Preheat the oven to the correct baking
temperature. Arrange racks so that the bread will bake in the center of the
oven which has the best heat distribution in the oven.
To allow for good air circulation while baking,
leave at least 1 inch
of space between pans and between pans and sides of oven. Switch pan positions
and rotate pans halfway through baking.
The two top secrets to moist, tender quick
bread is 1)in the mixing always use a quick light technique so you don't
over-mix the batter 2) don't over-bake since this cause dryness in the final
baked product. .
Quick breads can be created by the following
methods:
Muffin (or the two-bowl) method – The dry and
wet ingredients are kept separate and then are combined quickly and gingerly by
adding the wet to the dry, and folding the two together with only a few
strokes. The idea is to not over-mix, basically moistening the ingredients and
leaving the batter slightly lumpy, with wisps of flour showing (even small
lumps are fine) so as not to overdevelop the gluten in the flour which will
keep the bread tender. An over mixed batter creates tough and rubbery
muffins/quick breads. Since over-mixing will cause "tunnels" – holes
where the air bubbles can escape – which will make the quick bread tough.
Creaming method – The butter and sugar are
beaten and creamed together until smooth and fluffy. Next, the egg and liquid
flavoring are added to the butter and sugar mixture. The dry ingredients and
other liquids are folded in last. This method is best when baking cakes since a
lot of air pockets are added into the mixture. Folding in the ingredients
creates even more air pockets to keep the cakes light and fluffy.
Cutting in method – The chilled fat is cut into
the flour. The fat results in a flaky texture since the fat melts while in the
oven. This method is best used when baking biscuits, scones or pie crusts.
Depending on the recipe and the type of quick
bread, there are also three different types of batter:
Pour Batter: This type of batter has a
dry:liquid ratio of 1:1. Because there is so much liquid in this type of
batter, the result is very moist and dense.
Drop Batter: This batter has a dry:liquid ratio
of 3:1. This batter will result in a moist but fluffy baked good.
Stiff Dough: This batter has a dry:liquid ratio
of 7:1 This batter will result in a very light and fluffy baked good.
Lower gluten flours are best to make quick
breads you can replace 4 tablespoons in each cup of all-purpose flour with cake
flour in most recipes or replace 2 tablespoons in each cup of all-purpose flour
with corn flour (cornstarch) if you wish to lower the gluten levels of your
flour.
Flour should be sifted to aerate it which gives
more rise therefore a lighter crumb to the final baked goods.
Add fruit, nuts, etc. after lightly combining
the wet and dry ingredients. Then give the batter one more light-handed stir
and you're done. Is the batter still thick and lumpy? That's exactly what you
want
If you're adding dried fruit, try soaking it
first. This will moisten the fruit, make it tender and juicy, and also preserve
the bread's moisture. Don't sprinkle dried fruit on top of quick bread before
baking, as it will burn before the loaf is done.
To lower the fat, for example, you can
substitute some (or all) of the oil with an equal amount of almost any fruit
puree (apple sauce, plum baby food, pumpkin puree, mashed bananas).
Glaze your baked quick breads for a nice
finishing touch and burst of flavor. Make a simple mixture of confectioners'
(icing) sugar and a little milk or fruit juice. Try orange and lemon juices,
for their fragrant, tart zing; add curls of zest for extra color and flavor.
For most quick mix recipes as a general rule –
less butter and sugar in a recipe makes it more bread-like, while more butter
and sugar produces something closer to cake.
To prevent moist quick breads from spoiling,
let them cool completely after baking. Then wrap them tightly in foil or
plastic wrap and store at room temperature for up to 3 days. If your bread is
made with cheese, cream cheese or other perishable foods, it should be
refrigerated.
Quick breads such as banana, zucchini and
cranberry slice and taste best when served a day after baking. Wrap the cooled
bread in foil or plastic wrap; leave at room temperature overnight. Others like
cornbread and coffee cakes are best served warm.
The quick bread is done if a toothpick inserted
near the center comes out clean. If it is not done, test again in a few more
minutes.
Cool in the pan for 10 minutes, unless recipe
directs otherwise. Turn loaves out onto a wire rack to cool. Most quick bread
should be cooled completely before slicing to prevent crumbling.
Using a sawing motion, cut loaves with a thin
sharp knife. Use a serrated knife for quick breads that have fruits and/or
nuts.
Common Problems and troubleshooting (ref
http://allrecipes.com/howto/baking-quick-breads/)
Bread sticks to pan. Unless you're using
high-quality non-stick metal or silicone baking pans, you should always grease
the pans before you pour in the batter. The best thing to use for greasing the
pan is shortening, because its melting point is higher than any other kind of
fat, which helps maintain a "shield" between pan and batter while the
bread is baking. A high-quality cooking spray--one that won't bake on to your
pans and discolour them--is also a fast, easy fix. You can also prevent sticking
by removing the bread from the pan sooner: let the bread cool for at least
twenty minutes in order to set (Bundt loaves should cool twice as long) before
inverting the pan.
There are big holes and "tunnels" in
the bread, and/or the bread is tough. These problems are usually caused by
over-mixing.
There's a big crack down the middle of the
quick bread loaf. Don't worry--it's normal for quick breads. The crack on top
happens when top of the loaf "sets" in the heat of the oven before
the bread is finished rising. Drizzle the loaf with icing or dust with
confectioners' (icing) sugar.
My blueberry muffins look green! By reacting
with the alkaline baking soda, the blueberries' pigments can turn green. Toss
the berries with the flour mixture before combining the ingredients; the
coating should help. If you're using frozen berries, don't thaw them before
using them.
The bread looks done on the outside but it's
still raw in the middle. This is one of the most common quick bread problems,
and it can be caused by a few different factors. The oven temperature could be
too high. (Use an oven thermometer to check: they're cheap and available at
most supermarkets.)
Try lowering the oven temperature and/or
putting a loose tent of foil over the top of the bread so it won't burn before
the middle has time to catch up.
Another cause of "raw center"
syndrome could be using a different pan than the recipe calls for. One of the
nice things about quick breads is that you can use the same batter to make
muffins, mini loaves, jumbo loaves, or rounds. But each size requires different
baking times--and some require different baking temperatures. The larger and
thicker the loaf, the longer it's going to take to bake. If you're using a
different size pan than your recipe calls for, adjust the baking time
accordingly and check the bread often.
Mandatory Items: You must make a quick bread in
either a loaf shape or muffin/popover shape. You must share your recipe so we
can all recreate it after we’re done drooling over it! You cannot use yeast as leaven.
Variations allowed: You can use the recipes
I’ve included below or someone else’s or by all means, create your own! Go
crazy with flavors, toppings, and fillings!
Preparation time: Each recipe varies, but you
shouldn’t need more than 30 minutes in prep and 1 hour to bake (depending on
size of loaf/muffin/popover pan).
Equipment required:
An oven. Duh.
Bowls
Spatulas or Spoonulas (my tool of choice.. it’s
a spoon! No, it’s a spatula! It’s both!)
Whisk
A mixer – stand alone or hand held OR mix all
ingredients by hands like our ancestors did!)
Loaf pans and/or muffin pans and/or popover
pans
Measuring spoons and cups
Box grater or microplane grater
Parchment paper
Toothpicks, or wood skewers for cake testing.
BASIC QUICK BREAD
Makes one 9” x 5”
(23×13 cm) loaf
Recipe from Sara Schewe
2 cups (480 ml) (250 gm/9 oz) all-purpose
(plain) flour
1 cup (240 ml) (225 gm/8 oz) granulated sugar
1 teaspoon (5 ml) (5 gm ) baking soda
1/2 teaspoon (2½ ml) (3 gm ) fine sea salt or table
salt
1 cup (240 ml) buttermilk or soured milk*
1 large egg
1/4 cup (60 ml) mild- or non-flavored oil, like
canola
1 teaspoon (5 ml) flavored extract, such as
vanilla or almond
for the glaze
1/3 cup (80 ml) (35 gm/1-1/3 oz) confectioners’
(icing) sugar
1-2 teaspoons (5-10 ml) milk
Directions:
Preheat oven to moderate 350ºF/180ºC/gas mark
4. Grease a 9×5 inch (23×13 centimeter) loaf pan with butter and line with
parchment paper cut to fit the length and width of the pan, with enough
overhang to allow easy removal after baking. Grease the top sheet of parchment.
In large bowl, whisk flour, sugar, baking soda
and salt to combine. Make a well in the center and set aside.
Lightly whisk (butter)milk, egg, oil, and
extract to combine. Pour into well and stir until just mixed into a batter. The
batter will be lumpy and may still show a few streaks of flour.
Pour batter into prepared pan. Bake for 40-50
minutes, or until a cake tester comes out clean. Cool in pan on wire rack for
10 minutes, then remove from pan and cool completely before slicing. Drizzle
with glaze, if desired.
For the glaze: Slowly whisk confectioners’
(icing) sugar and half of the milk, adding more milk as needed to thin the
glaze to the desired consistency.
Note: To make soured milk, combine 1 cup milk
(240 ml) with 1 tablespoon (15 ml) vinegar or lemon juice and let sit for 10
minutes.
Pictorial Guide to Making a Quick Bread:
(Photo courtesy of Mandy of What The
Fruitcake?!)
1) Put dry ingredients in bowl
2) Mix with wet ingredients
3) Add additional flavorings (cheese, herbs,
seeds etc.)
4) Mix to make a very sticky dough
5) Spread into a parchment lined bread tin
6) (Optional) Top with (seeds, herbs etc.)
7) (Optional) Top with (any other flavor used
like grated cheese)
8) Baked!
Thank you WP2 *smooch*
AUNTY ANN’S PRUNE BREAD
Makes two 8” x 5”
(20 x 13 cm )
loaves
Now I know what you’re thinking.. PRUNE bread?
Ewwwwwwwwww. Seriously, it’s not a bad thing! Honestly, you can’t even really
taste the prunes, they help with the moistness of the bread. What you get is a
moist, sweet and slightly spicy bread that’s perfect plain or with a schmear of
butter at breakfast or with afternoon/evening tea or coffee.
Ingredients
2 cups (480 ml) (450 gm/16 oz) granulated sugar
1 cup (240 ml) mild- or non-flavored oil, like
canola
3 large eggs
2 small (70 gm/2½ oz) containers of strained
prunes baby food – I use Gerber! (a little over ½ cup)
2½ cup (600 ml) (350 gm/12-1/3 oz) all-purpose
(plain) flour
½ teaspoon (2½ ml)(1 gm ) ground cinnamon (okay,
use 1 teaspoon if you like a lil more spice.. My Aunty wouldn’t mind.
2 teaspoons (10 ml) (10 gm/1/3 oz) baking soda
1 teaspoon (5 ml) (6 gm ) table salt
1 teaspoon (5 ml) vanilla extract
1 cup (240 ml) well-shaken buttermilk
Directions:
1. Preheat
oven to moderate 325ºF/165°C/gas mark 3
2. Dump
all ingredients in a bowl.
3. Start
to mixin’! Once everything in incorporated stop mixin’!
4. Fill
two greased 8”
x 5” (20 x 13 cm ) loaf pans about ¾
full.
5. Bake
for 1 hour or until a toothpick inserted into middle of loaf comes out clean.
GREEN ONION, CHEDDAR & ASIAGO BEER BATTER
BREAD
Makes one 9” x 5”
(23 x 13 cm )
loaf
Adapted from Recipe Girl’s Cheddar Chive Beer
Batter Bread
Ingredients
1 tablespoon (15 ml) oil
1 cup (240 ml) (100 gm/3½ oz) sliced green
(spring) onion
3 cups (720 ml) (420 gm/15 oz) all-purpose
(plain) flour
3 tablespoons (45 ml) (45 gm/1½ oz) granulated
sugar
2 teaspoons (10 ml) (10 gm ) baking powder
1 teaspoon (5 ml) (6 gm ) salt
1 cup (240 ml) (115 gm/4 oz) grated sharp
cheddar cheese
½ cup (120 ml) (2 oz ) grated Asiago cheese
One (12 fl oz/355 ml) (about 1½ cups) bottle
beer (such as amber ale)
¼ cup (60 ml) (55 gm/2 oz) butter, melted and
divided
Directions:
Preheat oven to moderately hot 375°F/190°C/gas
mark 5. Spray 9”×5? (23 x 13
cm ) loaf pan with cooking spray.
Heat olive oil in a large nonstick skillet over
medium heat. Add green onion and sauté 3-4 minutes or until tender. Cool to
room temperature.
Combine flour, sugar, baking powder and salt in
a bowl; make a well in the center of the mixture. Add onion, cheeses, and beer.
Stir just until moist.
Spoon batter into prepared pan. Drizzle evenly
with 2 tablespoons of butter. Bake for 35 minutes; brush with remaining 2
tablespoons butter. Bake an additional 23 minutes or until wooden pick inserted
in the center comes out clean. Cool 5 minutes in pan on a wire rack; remove
from pan. Cool completely on wire rack.
PUMPKIN BREAD WITH MAPLE CREAM CHEESE FILLING
Makes three 8”x 4” (20 x 10 cm ) loaves
Adapted from Dana Ramsey’s recipe
Ingredients
Filling
2 (225 gm/8 oz) packages cream cheese, softened
1/4 cup (60 ml) (55 gm/2 oz) white granulated
sugar
1 large egg
1 tablespoon (15 ml) milk (can use whole, 1%,
2% or skim.. can even splurge and use cream!)
1 teaspoon (5 ml) maple extract* or 1
tablespoon (15 ml) maple syrup
Bread
3 cups (720 ml) 675 gm/24 oz)white granulated
sugar
1 3/4 cup (420 ml) (425 gm/15 oz) (pumpkin
purée (or 1 can (15 oz )
solid-packed pumpkin – NOT pumpkin pie filling)
1 cup (240 ml) light- or non-flavored oil, like
canola
1 cup (240 ml) water
4 large eggs
4 cup (960 ml) (560 gm/19¾ oz) all-purpose,
unbleached flour
2 teaspoons (10 ml) (10 gm/1/3 oz) baking soda
1 teaspoon (5 ml) (5 gm ) baking powder
2 teaspoons (10 ml) (4 gm ) ground cinnamon
1/2 teaspoon (2½ ml) (1 gm ) ground nutmeg
1 teaspoon (5 ml) (6 gm ) salt
1/4 teaspoon (1¼ ml) (½ gm) ground cloves (I
omitted this)
1/2 cup (120 ml) (115 gm/4 oz) chopped pecans
(Optional)
1/2 cup (120 ml) (115 gm/4 oz) chopped walnuts
(Optional)
1 cup (240 ml) (100 gm/3½ oz) currants or
raisins (Optional)
*Note: I would never ask anyone to buy an
ingredient that isn’t 100% necessary for a recipe, but I HIGHLY RECOMMEND
buying maple extract. You get a much better maple flavor than using maple
syrup. But this bread would be delicious regardless of which maple option you
used.. trust me.
Directions:
Preheat oven to moderate 350°F/180°C/gas mark
4. Spray three 8”×4? (20 x 10
cm ) loaf pans with cooking spray.
Beat the cream cheese, sugar, egg and milk in a
small bowl until creamy, add your maple extract or syrup and blend. Set aside
for now.
In a large bowl, beat the sugar, pumpkin, oil,
water and eggs. In another large bowl mix the flour, baking soda, baking
powder, salt and spices.
Now gradually add the dry ingredients to your
wet. Stir in the nuts and/or dried fruit if using.
Pour half of the batter into three
flour-greased 8" x 4" (20 x 10 cm ) loaf pans.
Spoon the filling over the batter. Use a
spatula to spread it out carefully.
Add the remaining batter making sure you
completely cover the filling.
Bake for 50 minutes or until a toothpick
inserted near the center comes out clean. Cool 10 minutes in the pans before
removing the bread to a wire rack to cool completely. Store your bread in the
refrigerator wrapped in plastic wrap.
MEYER LEMON LOAF
Makes two 8” x 5”
(20 x 13 cm )
loaves
Adapted from Recipe Girl’s Meyer Lemon Loaf
Ingredients
Loaf:
2 2/3 cups (640 ml) (375 gm/13¼ oz) all-purpose
(plain)unbleached flour
¾ teaspoon (3¾ ml) (3¾ gm) baking powder
zest of 3 Meyer lemons (regular old lemons will
work just fine)
2 cups (480 ml) (450 gm/16 oz) white granulated
sugar
6 large eggs, at room temperature
¾ cup (180 ml) sour cream or creme fraiche, at
room temperature
2 tablespoons (30 ml) rum (can omit – I did!)
1½ tablespoons (22½ ml) fresh Meyer lemon juice
(again, regular lemons can be used)
pinch of salt
9 tablespoons (135 ml) (125 gm/4½ oz/1 stick +
1 tablespoon) butter, melted and cooled
Simple Syrup:
½ cup (120 ml) (115 gm/4 oz) granulated sugar
½ cup (120 ml) water
Juice from 1 medium Meyer Lemon (or regular
lemon)
Directions:
Preheat oven to moderate 350°F/180°C/gas mark
4. Butter and flour two 8”
x 5” (20 x 13 cm ) loaf pans.
Sift together flour and baking powder; set
aside.
Place sugar, lemon zest, and eggs into a large
mixing bowl and beat with a whisk until the mixture is a light lemon color and
thickened a bit. This can also be done with a mixer. Whisk in sour cream, then
salt, then rum (if using) and lemon juice.
Gently whisk in the flour in four parts, then
whisk in the butter in three parts. You’ll have a thick, pourable batter
flecked with lemon zest.
Pour the batter into the prepared pans and bake
for 50 to 55 minutes, or until cake tester inserted in center comes out clean.
While the loaves are baking, prepare simple
syrup. Boil together sugar and water and stir until sugar is dissolved. Remove
from heat and add the lemon juice.
Turn the loaves out of their pans onto a
cooling rack and brush liberally with the lemon syrup, repeat brushing as you
feel necessary. Let cool.
Storage & Freezing Instructions/Tips:
Loaves can be kept wrapped tightly on the
counter or in the fridge for approximately 5 to 7 days. Loaves last 6 months if
wrapped tightly and kept air tight in the freezer.
Additional Information:
A popular blogger’s top 10 quick bread recipes
Joy of Baking’s assorted recipes and videos of
quick breads
Peach Pie Quick Bread Video – sounds so good!!
A beer batter bread recipe.. doesn’t seem to be
special until she pours melted butter all over it!
A great primer on making quick breads from King
Arthur's flour website
Disclaimer:
The Daring Kitchen and its members in no way
suggest we are medical professionals and therefore are NOT responsible for any
error in reporting of “alternate baking/cooking”. If you have issues with
digesting gluten, then it is YOUR responsibility to research the ingredient
before using it. If you have allergies, it is YOUR responsibility to make sure
any ingredient in a recipe will not adversely affect you. If you are lactose
intolerant, it is YOUR responsibility to make sure any ingredient in a recipe
will not adversely affect you. If you are vegetarian or vegan, it is YOUR
responsibility to make sure any ingredient in a recipe will not adversely
affect you. The responsibility is YOURS regardless of what health issue you’re
dealing with. Please consult your physician with any questions before using an
ingredient you are not familiar with. Thank you!